
Machine Overview
Main Interface Diagram
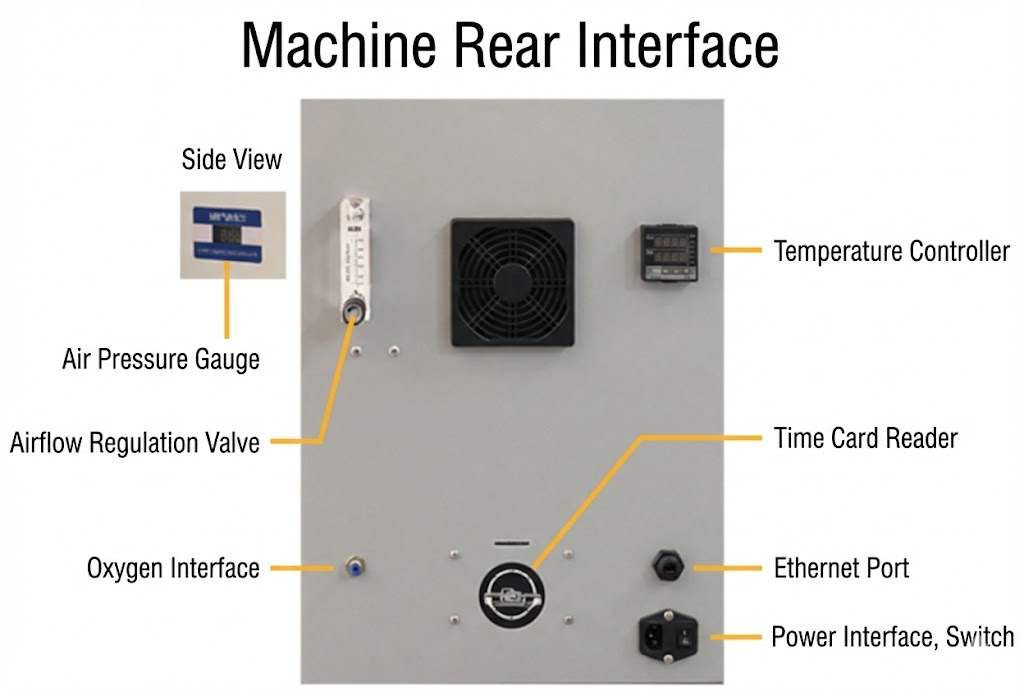
Special Attention (Power Sequence):
Startup Procedure: Main Power → Computer → Control Software
Shutdown Procedure: Control Software → Computer → Main Power
Layout and Slicing
Cophoda3D Slicing Software (Paid Software)
Cophoda3D is not included as standard. Most users can use their own modeling software for SLC slicing. If needed, contact sales for a 30-day trial version.
Import: Click File > Import File and select your STL model.
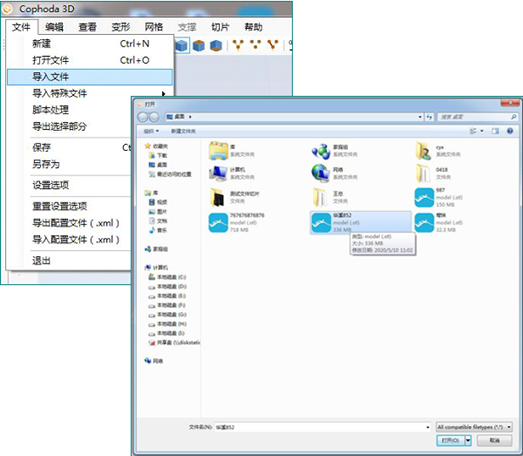
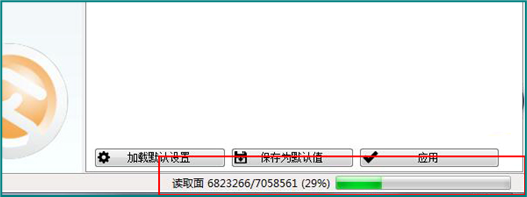
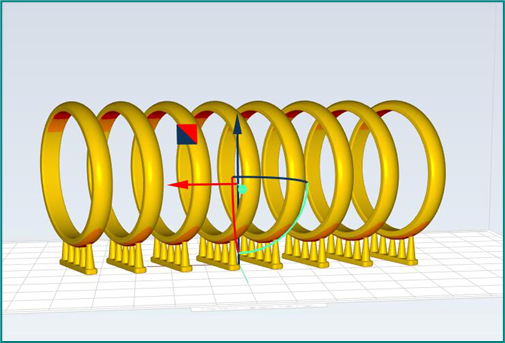
Check: Once loaded, verify the model for supports, broken meshes, or other errors.
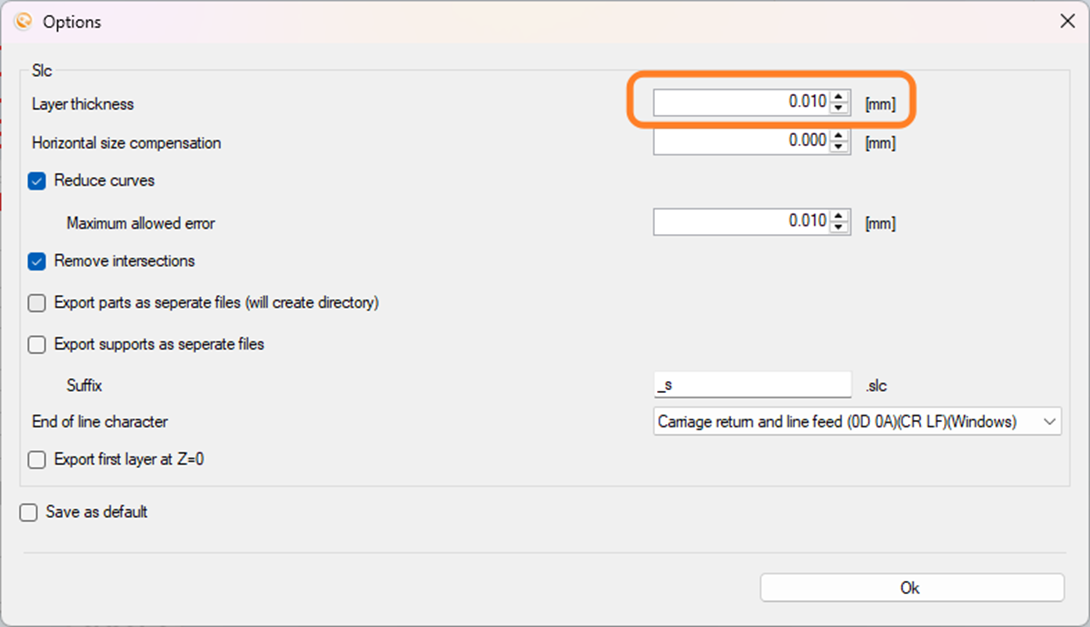
Export SLC: Click File > Save As, select SLC format. Set the correct layer thickness and execute slicing.
Support and Layout Design Recommendations
Due to the principles of DLP (Digital Light Processing), proper supports are essential for a successful print.
Geometry: Supports should generally form a triangular structure for stability.
Spacing: Objects should be at least 0.5mm from the edge of the build area and 0.3mm from each other.
Rotation: For better results, rotate the object 15° or 30° in the top view.
Lowest Point (Main) Support: All structures must start with a support at the lowest point (the "foundation").
Auxiliary Supports: Add extra supports based on the complexity of the part (like bridge trusses) to ensure stability.
Thickness: * Supports from the build plate should be at least 0.3mm thick.
General supports range from 0.3mm to 2mm depending on length.
For very thick supports, you can taper the contact point to reduce surface damage.
Orientation: Choose an angle that minimizes supports and maximizes stability. Avoid large flat surfaces (angles over 50° are better) and suction cup structures to prevent the part from being pulled off by vacuum forces.
Hollowing (Shelling): For solid parts, we recommend hollowing. This saves resin and reduces pull force during printing. Note: Always add two or more vent holes to allow internal resin to drain.
Printing Operation Workflow
I. Preparation Before Startup
Check the flow meter. It must be at the lowest setting (especially if the machine is new or hasn't been used for a long time). If not, turn it clockwise to close it.
Ensure the Resin Tank is securely installed, locking screws are tight, and air hoses are intact.
Switch on the Main Power at the back and the Oxygen Generator.
Confirm the front panel indicator is on, then press the front power button to start the PC.
Slowly turn the flow meter valve counter-clockwise (at the back) to adjust air pressure to 0.5 - 0.6 (or as specified by the installation engineer).
Wait 5 minutes for oxygen flow to stabilize, then re-confirm the pressure.
Check that the resin in the tank is clear and free of impurities. Heat and shake the resin bottle thoroughly before use.
II. Pre-Run Inspection
Ensure the Z-axis is at the top and the large screw on the Build Platform is fully tightened.
Check that the software clock is running and the side air pressure is fluctuating stably around the set value.
Verify resin color and clarity. Use a silicone scraper to stir the material after the system heats it. (Tip: Use an ultrasonic cleaner to shake the resin before pouring).
Confirm the thermometer on the back reads 40°C.
Wait for the machine to reach temperature, then stir the resin to bring bubbles to the surface.
III. Running the Print
Transfer the SLC file to the printer’s mini PC.
Launch the control software. If any pop-ups appear (due to power cuts, etc.) with "Yes/No" options, select "No".
Click "Import SLC File". Verify the filename, layer thickness, total layers, and estimated time in the bottom-right info box.
Re-confirm: Air pressure is correct, tank is clean, build platform is secure. Click "Run" to start.
IV. Post-Print & Part Removal
Wait for the platform to rise to the top (Standby) and the software timer to stop.
Check the part for completeness and the tank for debris.
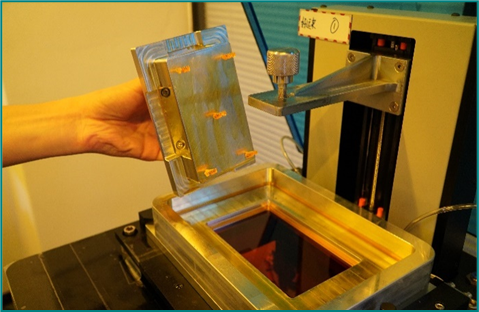
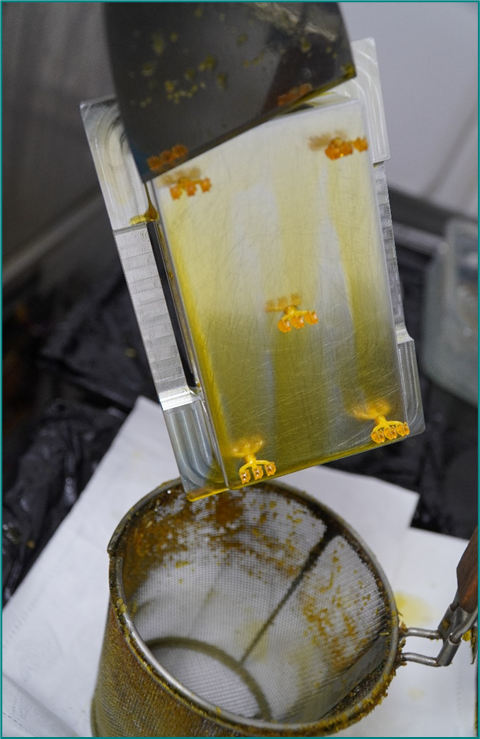
Loosen the large screw and remove the Build Platform. Caution: Resin will drip from the platform.
Hold the platform over the tank for a moment to let excess resin drip back in.
Use a wooden putty knife to remove the part (including the base and supports) from the platform.
Clean the platform surface thoroughly. Ensure no residue remains before re-installing and locking it back onto the Z-axis.
[CAUTION]
Resin contains chemicals. Always wear gloves and avoid direct skin contact.
Be careful not to let resin drip onto the projector or other internal machine parts.
Cleaning, Curing, and Maintenance
I. Cleaning and Curing Process
Preparation: Prepare three beakers with 99% Analytical Grade Alcohol (Ethanol).
Cleaning: Wash the part in the three beakers sequentially.
Standard: 5 minutes per beaker in an ultrasonic cleaner.
Fast: 30-60 seconds in ultrasonic, followed by manual shaking.
Rinse: Wash with hot water to remove residual alcohol.
Secondary Curing: * Submerge the part in a bowl of water (completely covered).
- Place in a 1000W curing oven for 30+ minutes (60+ mins for 500W).
Drying: Remove from water and blow dry. (Recommended: Use a hair dryer on a hot setting until the part turns white/dry).
II. Maintenance and Troubleshooting
Resin Tank Care: Never use sharp objects in the tank. The Oxygen-permeable membrane is a high-cost core component; handle with extreme care.
Tank Cleaning & Filtering: If a print fails or debris is found:
Use the "Clean Curing" function to remove small bits from the bottom.
For large debris, push it to the edge with a silicone scraper.
For fine particles, filter the resin through a fine nylon mesh and clean the tank with alcohol and paper towels.
- Crucial: Always remove the build platform before removing the resin tank to prevent drips onto the projector glass.
Build Platform Maintenance: Ensure the surface is thoroughly clean after every print. If the locking screw becomes stiff, resin may have leaked inside. Soak the screw in IPA, clean in an ultrasonic cleaner, and scrape off residue with a blade.
Daily Maintenance: * Check software status, platform cleanliness, and tank surroundings.
Confirm Air Pressure (0.50 - 0.55) and Temperature (40°C).
Weekly: Shut down the PC/Software, disconnect power for 1 minute, filter all resin, and deep clean the platform and tank.